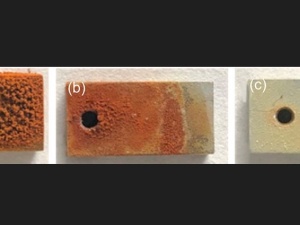
Corrosion: An Introduction
Corrosion is an important industrial problem with an estimated global cost equal to approximately 3.4% of the worldwide gross domestic product in 2013.1 Besides the enormous economic implications, corrosion in structures, critical pieces, and equipment can cause severe accidents, putting people at risk. For example, corrosion fatigue led to the sudden collapse of the Silver Bridge (Point Pleasant, OH) in 1967, which resulted in the loss of 46 lives and cost millions of dollars.2 Moreover, corrosion can affect health due to pollution from corrosion products, cause the depletion of natural resources, and negatively impact the appearance of materials.
The majority of corrosion processes involve electrochemical redox reaction; however, the corrosion type depends on the environmental conditions and the material’s characteristics. One common way to distinguish corrosion is between generalized and localized. The former occurs homogeneously over the entire surface of the material and causes almost total deterioration, making it the most damaging corrosion and, at the same time, the most easy to identify. It is a common problem in the construction industry, affecting ferrous materials that are not alloyed with other stainless materials.
On the other hand, localized corrosion is more difficult to detect, making it a greater risk than generalized corrosion. Localized corrosion occurs at specific points in a material, depending on its geometry and the environmental conditions. Among the several forms of localized corrosion, pitting and intergranular corrosion are the most critical. Pitting corrosion3 occurs mainly in passivated materials. When oxidizing agents accumulate and the pH of the medium increases, the passivation layer deteriorates, generating corrosion in localized areas. It develops mainly in the direction of maximum deformation and is accompanied by peeling of individual metal particles so that it can be detected visually without the use of instruments. On the other hand, intergranular corrosion4 is caused by the segregation of impurities at the grain boundaries or by the enrichment/depletion of one or more alloy elements in the areas surrounding the grain boundary. This type of corrosion cannot be detected by the naked eye, so nondestructive control methods must be used.
Another important type of localized corrosion is stress corrosion cracking5 (SCC), which is caused by the synergistic effect of a susceptible material, a corrosive environment, and a minimum stress. SCC results in rapid, catastrophic failure via cracking, which originates in the material surface and propagates as a response to the applied stress.
Corrosion wear (or tribo-corrosion)6 is the result of a chemical reaction accelerated by temperature. It is usually caused by moisture or other corrosive liquid or gas. In addition, wear can result from the dynamic contact between two surfaces, such as abrasion and erosion. Corrosive wear is defined as the damage caused by the synergistic attack of wear and corrosion when wear occurs in a corrosive environment. Rust, or oxidation, is the best-known form of corrosive wear.
Microbiologically induced corrosion7 (MIC) is another relevant corrosive route, where an electrochemical process produces the deterioration of a metallic material where microorganisms (bacteria, fungi, or algae) are involved, either initiating, facilitating, or accelerating the corrosive attack mechanism.
Two critical tools to detect and classify corrosion types are optical and electronic microscopes. Samples are treated using standardized processes to reveal the material’s microstructure (metals in particular), which are affected by composition, processing conditions, and post-processing variables. The use of microscopy is a key element in failure investigations and usually provides the necessary information to determine the cause of failure. However, the analysis of micrographs is not straightforward. For example, the cracks caused by SCC are very narrow and closed, making visual identification of this type of cracking before a failure difficult. Therefore, the use of instruments that provide high resolution is critical to assess the state of a given material sample.
References
1. Bowman, E. et al. International Measures of Prevention, Application, and Economics of Corrosion Technologies Study. NACE Int. 1–216 (2016).
2. Davis, J. R. Corrosion: Understanding the Basics. (ASM International, 2000).
3. Vargel, C. Pitting corrosion. in Corrosion of Aluminium 163–183 (Elsevier, 2020). doi:10.1016/B978-0-08-099925-8.00014-4.
4. Vargel, C. Intergranular corrosion. in Corrosion of Aluminium 185–197 (Elsevier, 2020). doi:10.1016/B978-0-08-099925-8.00015-6.
5. Raja, V. S. & Shoji, T. Stress Corrosion Cracking: Theory and Practice. (Elsevier Science, 2011).
6. Li, D. Y. Corrosive Wear. in Encyclopedia of Tribology (eds. Wang, Q. J. & Chung, Y.-W.) 590–596 (Springer US, 2013). doi:10.1007/978-0-387-92897-5_866.
7. Telegdi, J., Shaban, A. & Trif, L. Microbiologically influenced corrosion (MIC). in Trends in Oil and Gas Corrosion Research and Technologies 191–214 (Elsevier, 2017). doi:10.1016/B978-0-08-101105-8.00008-5.
8. Was, G. S. Corrosion and Stress Corrosion Cracking Fundamentals. in Fundamentals of Radiation Materials Science 857–949 (Springer New York, 2017). doi:10.1007/978-1-4939-3438-6_15.
Source: Preview Image: Piotr Krzeslak/Shutterstock


